Hacking Gmail to use custom domains for free
It’s pretty much common knowledge that Gmail is awesome. It’s fast, connects seamlessly with the rest of your Google services such as Drive, has a cool app called Inbox, and is overall an extremely powerful email service. However, to use it with a custom domain, you need to purchase Google Apps for either $5 or $10/month, which for casual users is a bit unnecessary. On top of that, you don’t even get all of the features a personal account gets, e.g. Inbox.
However, there’s a free way to use your Gmail account with a custom domain: Mailgun.

Mailgun advertises itself as a set of “powerful APIs that enable you to send, receive and track email effortlessly.” Reading that description, you may be wondering how a developer tool could allow you to use Gmail with custom domains for free. Basically, Mailgun has two components that allow you to do this: an email forwarding service and an SMTP server.
Setup
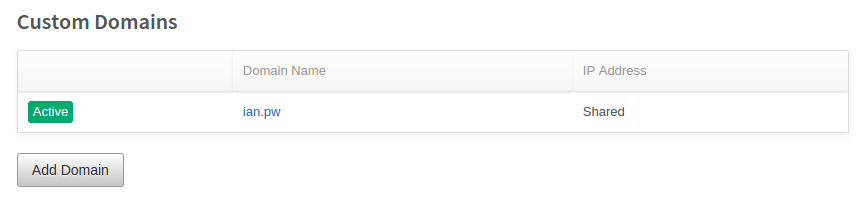
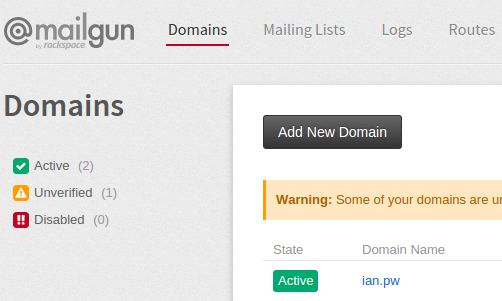
First, sign up with Mailgun using your Gmail email. Do not use your email with your custom domain, as it will cause problems later when you want to verify your account. Once you have clicked the confirm link, log in to the Mailgun website. You should be presented with a dashboard. Now on the right under “Custom Domains”, click “Add Domain”.
Follow the instructions and set your DNS records with whoever manages your DNS.
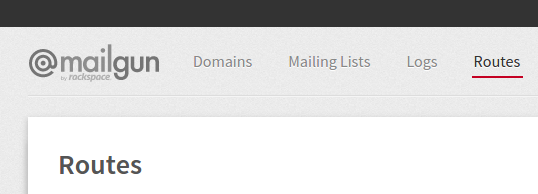
Once you’ve done this, click on the “Routes” link on the top to set up email forwarding.
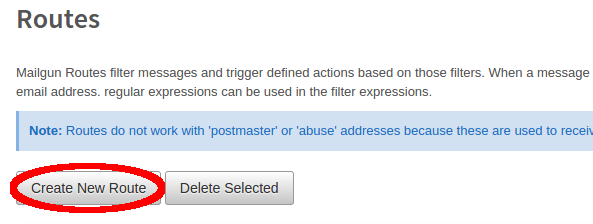
Forwarding
On this page, you want to click “Create New Route”.
Then, on this page, enter the following information:
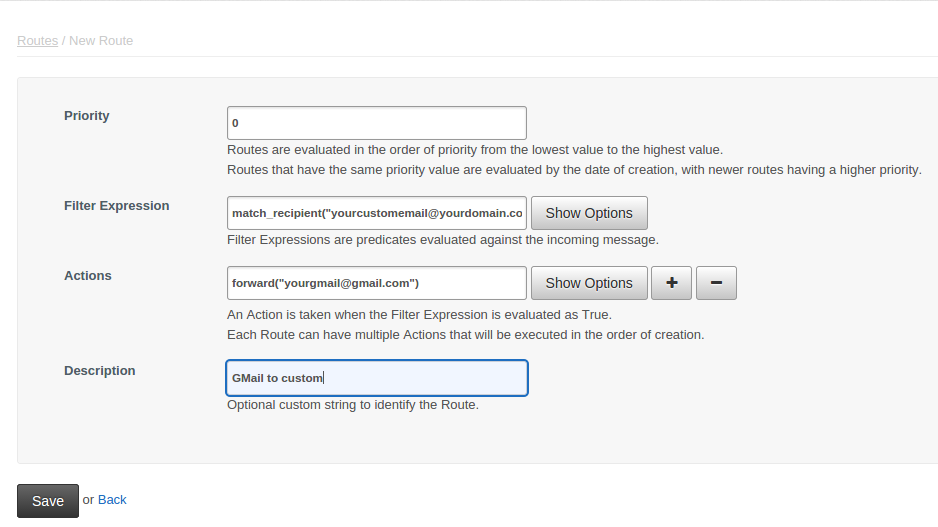
Replace the emails within the quotation marks with the desired emails.
Sending with SMTP
Next, we will set up our SMTP configuration so we can send emails from an actual server.
Underneath the “Domains” tab, click on your domain name.
On this page, click “Manage your SMTP credentials” then “New SMTP Credential” on the next page.
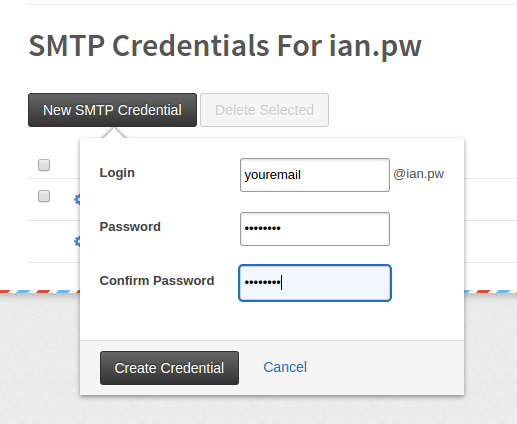
Type in the desired SMTP credentials.
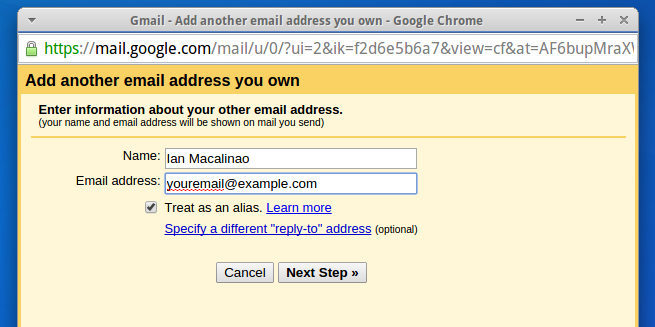
Next, go to the Accounts tab in your Gmail Settings and click “Add another email address you own”. Once you open this window, enter the email address you wish to send from.
Then, set the SMTP settings as follows.
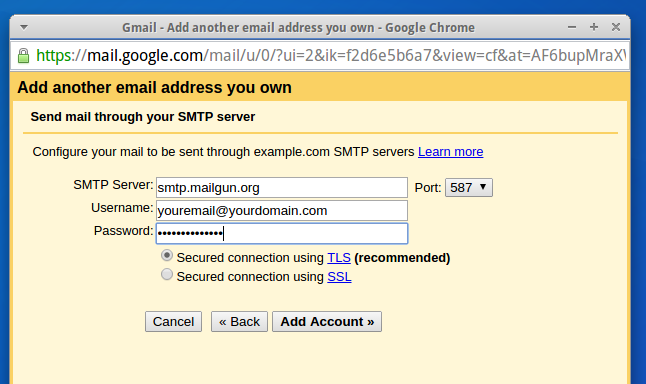
- Server: smtp.mailgun.org
- Port: 587
- Username: The full email address, e.g. “[email protected]”
- Password: Whatever you set in Mailgun
After clicking “Add Account”, now you’re done! Enjoy your free email service for up to 10,000 emails a month!
Thanks for reading my post! If you enjoyed it or it helped you, please consider liking/tweeting this page, commenting, or following me on GitHub or Twitter!